Dealing with dim kitchen lighting while prepping food can be a real pain point, and the most straightforward solution is often to add targeted spot lighting. It makes a significant difference in visibility, safety, and ultimately, how much you enjoy your time in the kitchen. Instead of struggling to see what you’re chopping or where you’re measuring, a little focused light can transform those tasks into something much more manageable.
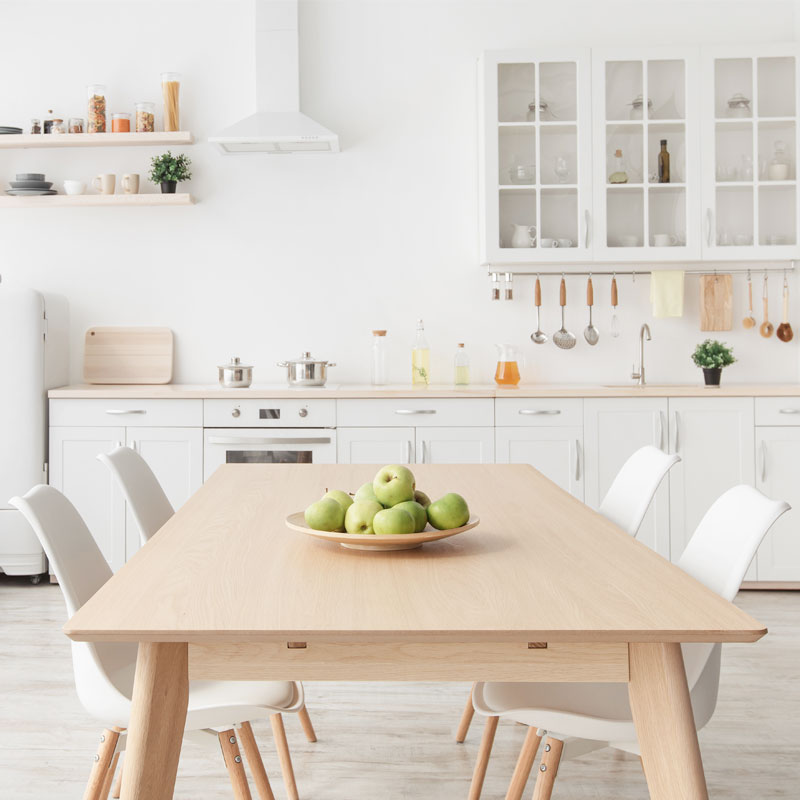
Let’s be honest, most kitchens have general overhead lighting, which is fine for walking around or eating, but it rarely cuts it for detailed work. When you’re slicing vegetables, dicing onions, or even just reading a recipe, shadows from your own body or cabinets can turn your countertop into a poorly lit stage.
Beyond General Illumination
Think about it: your overhead light source is usually behind you, casting shadows right where your hands are working. Spot lighting, on the other hand, is positioned to directly illuminate your primary work areas. This means less strain on your eyes and a clearer view of what you’re doing. It’s not just about brighter light; it’s about where that light is focused. This direct illumination is key to reducing errors and making cooking a more enjoyable process.
Safety First
Better visibility directly translates to better safety. A sharp knife and a poorly lit prep area are a recipe for an accident. When you can clearly see the lines you’re cutting, the ingredients you’re handling, or even the small print on a food package, the risk of slips, cuts, or other mishaps significantly decreases. It’s a practical step towards a safer kitchen environment, especially when you’re tired or distracted.
Types of Spot Lighting for Kitchen Prep
When we talk about spot lighting, we’re not just limited to one kind of fixture. There are several options, each with its own advantages, ready to be integrated into your kitchen.
Under-Cabinet Lighting
This is probably the most popular and effective form of spot lighting for prep areas. Mounted directly underneath your wall cabinets, these fixtures flood the countertop below with light, exactly where you need it.
LED Strips and Pucks
- LED Strips: These are flexible and can be cut to length, offering continuous, even illumination across a large section of your countertop. They’re energy-efficient and come in various color temperatures to match your existing lighting. Installation can range from simple peel-and-stick (for battery-operated or plug-in options) to hardwiring for a more integrated look.
- LED Puck Lights: These are small, circular lights that provide focused pools of light. They work well for smaller sections or if you want to highlight specific areas. Often battery-operated or plug-in, making them easy to install without an electrician. They can create a more decorative feel but might be less uniform than strip lighting.
Bar Lights
These are typically more robust fixtures, often fixed-length and slightly larger than strip lights. They offer powerful, directed light and are good for longer sections of countertop. They tend to be hardwired and have a more permanent, integrated feel, often with their own diffusers to soften the light.
Track Lighting
If you don’t have upper cabinets or want more flexibility in direction, track lighting can be a good choice. A track is installed on the ceiling, and individual spot heads can be attached and adjusted to point exactly where you need light.
Adjustable Heads
The main benefit here is the ability to adjust the direction of each spot. You can angle them towards different prep zones as your needs change. This adaptability is great if you have multiple workstations or if your kitchen layout is unconventional. You can swivel and tilt the heads to eliminate shadows from various angles.
Installation Considerations
Track lighting requires ceiling installation, which often means an electrician if you’re not comfortable with electrical work. It’s a more noticeable fixture type, so consider how it fits with your kitchen’s overall aesthetic. However, the versatility often outweighs the initial installation effort.
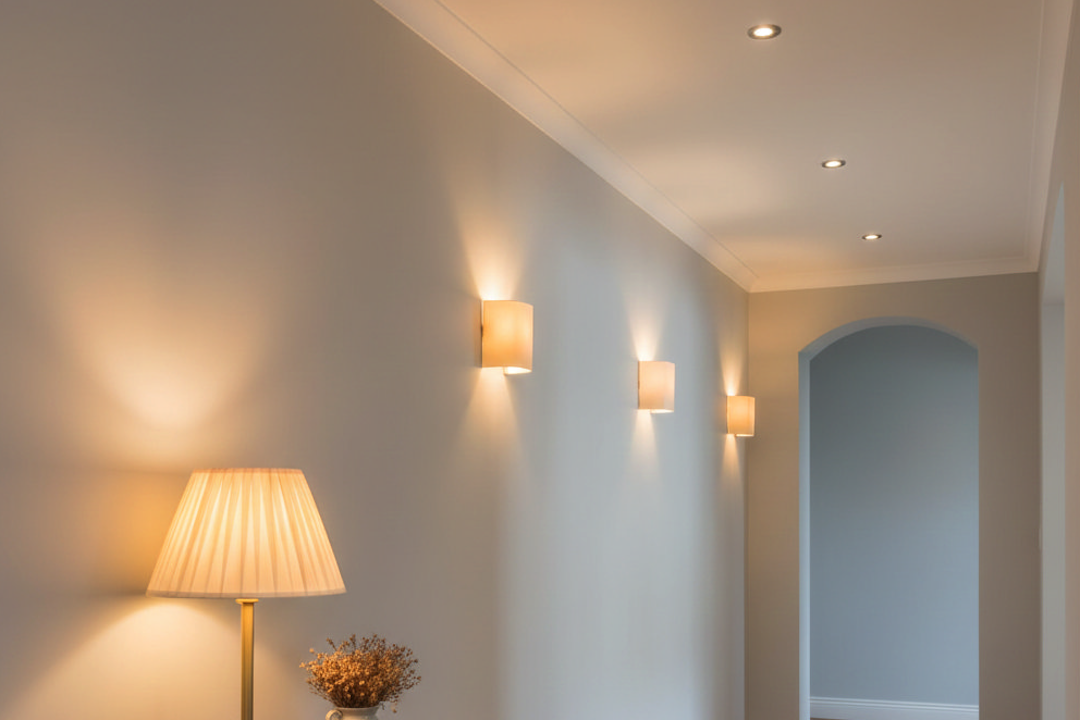
Recessed Lighting with Directional Trims
While often used for general lighting, recessed lights with adjustable gimbals or eyeball trims can be aimed to provide spot illumination. These fixtures are installed flush with the ceiling, offering a sleek, unobtrusive look.
Gimbal and Eyeball Trims
- Gimbal Trims: These allow the light bulb to be angled within the housing, directing the light beam.
- Eyeball Trims: Similar to gimball trims, but the “eyeball” portion can be rotated and tilted, offering even greater adjustability.
Blending In
Recessed lighting is great for maintaining a clean, uncluttered ceiling line. By carefully placing these with directional trims, you can achieve powerful spot lighting without any visible fixtures hanging down. This is particularly effective in modern or minimalist kitchen designs where you want the light source to be discreet.
Choosing the Right Color Temperature and Brightness
It’s not just about having light; it’s about having the right kind of light. Color temperature and brightness play a crucial role in how effective and comfortable your spot lighting will be.
Color Temperature (Kelvin)
This refers to the warmth or coolness of the light. It’s measured in Kelvins (K).
Warm White (2700K-3000K)
This light has a yellowish hue, similar to traditional incandescent bulbs. It’s often described as cozy and inviting. While good for ambiance, it can sometimes make colors look less vibrant, which isn’t ideal for seeing the true color of food. If your main kitchen lighting is warm, you might want to match it to avoid a jarring contrast.
Cool White (3500K-4000K)
This is a more neutral, balanced light. It’s often preferred for task lighting because it provides good contrast without feeling too sterile. Food colors generally appear true under cool white light, making it a popular choice for prep areas. This range often feels bright and crisp.
Daylight (5000K-6500K)
This light mimics natural daylight and has a bluish tint. It offers excellent clarity and color accuracy, which can be great for detailed work like garnishing or intricate knife work. However, some people find it too harsh or clinical for a home kitchen, especially if used extensively. It’s important to test this range to see if it suits your preference.
Mixing Temperatures
You might consider using a slightly cooler temperature for your task lighting than your general ambient lighting. This creates a clear distinction between task and ambient light, enhancing functionality while maintaining overall warmth in the room.
Brightness (Lumens)
Lumens measure the total amount of visible light produced by a source. For task lighting, you generally want a higher lumen output than for general ambient lighting.
Aim for Sufficient Output
While there’s no one-size-fits-all lumen recommendation, for kitchen prep areas, look for fixtures that provide at least 200-400 lumens per foot for strip lighting, or individual pucks/spots that offer similar intensity over their focused area. The goal is to eliminate shadows and illuminate the work surface effectively without causing glare.
Dimmable Options
Always consider dimmable fixtures. This allows you to adjust the brightness based on the task at hand or the time of day. You might want full brightness for detailed chopping but a softer glow when just wiping down the counters. Dimmers add versatility and help set different moods in the kitchen.
Installation and Placement Tips
Even the best lighting fixtures won’t perform their best if not installed correctly. Thoughtful placement is key to maximizing their benefits.
Under-Cabinet Lighting Placement
For under-cabinet lights, the goal is to illuminate the entire countertop directly below without casting shadows on your work.
Front vs. Back Placement
- Towards the Front: Installing lights closer to the front edge of your cabinets (about 1-2 inches in) helps direct light towards the center of your countertop and reduces the chance of casting shadows on yourself. This placement offers the most consistent illumination across the primary work surface.
- Towards the Back: Placing lights closer to the back (against the wall) can create a decorative “wash” effect on the backsplash, but it’s less effective for task lighting as it focuses light too far back and often creates more shadows when you lean over the counter.
Track and Recessed Lighting Angles
When using track or recessed lights with adjustable heads, experimenting with angles is crucial.
Target Your Work Zones
Aim the light beams directly at your primary prep zones: where you chop, mix, or read recipes. Avoid aiming them purely vertically if you notice shadows forming from your body. A slight angle can often mitigate this issue. If you have a kitchen island, make sure these lights are angled to hit the island’s surface without creating glare for people sitting or standing nearby.
Avoid Glare
One common mistake is aiming lights so they reflect brightly off shiny surfaces directly into your eyes. Adjust the angle until the light illuminates the surface without causing discomfort. Sometimes, diffusing lenses can help reduce glare, even with powerful spotlights.
Powering Your Lights
Consider how you’ll power your chosen fixtures.
Plug-In vs. Hardwired
- Plug-In: Easier to install as they just need an outlet, offering flexibility if you’re renting or prefer DIY. They might have visible cords, which can be less aesthetically pleasing. Battery-operated puck lights also fall into this category and are excellent for quick, temporary solutions.
- Hardwired: Offers a cleaner, more integrated look. Requires electrical work, potentially involving an electrician, but connects directly to your home’s wiring. This is generally preferred for permanent installations and often allows for wall switch control.
Smart Lighting Integration for Enhanced Control
In today’s connected homes, smart lighting can take your kitchen prep experience to the next level, offering convenience and unparalleled control.
Dimming and Color Temperature Control
Many smart spot lighting systems offer the ability to dim the lights and even change their color temperature directly from an app or voice command.
Tailoring to the Task
Imagine preparing a delicate dessert that needs precise focus under cool, bright light, then switching to a warmer, softer glow for plating a meal or enjoying a late-night snack. Smart controls make this seamless, allowing you to instantly adapt the lighting to the specific task or time of day. This flexibility can also help reduce eyestrain over long periods in the kitchen.
Scene Setting
You can create different “scenes” for various kitchen activities. For example, a “Cooking” scene might activate all prep lights at 75% brightness and 4000K, while a “Cleaning” scene could crank everything to 100% brightness and 5000K. This automation removes the guesswork and makes your kitchen lighting instantly functional for whatever you’re doing.
Voice Control and Automation
Integrating your spot lighting with smart assistants like Google Assistant or Amazon Alexa offers hands-free control.
Hands-Free Operation
When your hands are covered in flour, oil, or food, being able to simply say “Alexa, turn on prep lights” is incredibly convenient. It saves you from touching light switches and potentially cross-contaminating surfaces. This also contributes to a cleaner kitchen environment by minimizing contact with fixtures that might otherwise get dirty.
Scheduling and Motion Sensors
You can also set schedules for your lights to turn on or off at certain times, or even incorporate motion sensors. This means your prep lights could automatically illuminate when you step into the kitchen, ensuring you always have adequate light without even thinking about it. For example, a motion sensor under your upper cabinets could trigger the under-cabinet lighting when you approach the counter.
Final Thoughts on Elevating Your Kitchen Prep
Investing in good spot lighting for your kitchen prep areas is a practical upgrade that yields significant returns in terms of convenience, safety, and overall enjoyment. It moves beyond purely aesthetic considerations, focusing instead on tangible improvements to how you interact with your cooking space.
By strategically choosing the right types of fixtures, paying attention to color temperature and brightness, and carefully considering placement, you can transform a frustratingly dim workspace into an efficiently lit culinary zone. And with the added sophistication of smart lighting, you gain an even greater degree of control and flexibility, making your kitchen more adaptable to your needs than ever before. It’s about making your kitchen work better for you.